Browsing Category

Our Story

0 In Mom Life/ Our Story/ Tips and Tricks

5 Tips for Taking Beautiful Newborn Photos at the Hospital

I can’t even believe that our sweet baby girl will be two months old so soon! Time is flying by so fast, and I’m just trying to soak it all in. Stay little, Kinley Katherine.

I’m so happy that we have our newborn photos from the hospital to remind us of that special day. It truly feels like a blur now, because it all flew by in a second. I strongly recommend capturing these images that will last a lifetime.

During our hospital stay, we scheduled a photo shoot with Bella Baby Photography . They are on-site at hospitals throughout the country including the one we delivered in.

We couldn’t have been happier with our experience with Bella Baby. The whole shoot only took around 15 minutes, and we received our photos just 30 minutes later. Our photographer was so sweet and helped to pose us with baby to make sure that our photos turned out beautiful. The best part was that the actual photo session was complimentary. You don’t need to make the decision to purchase until you’re presented with the photo proofs.

After our wonderful experience, I’m sharing with you five tips for taking beautiful newborn photos at the hospital.

Continue Reading →
0 In Mom Life/ Our Story

Kinley’s Birth Story

Kinley's Birth Story

I can’t even believe that our sweet baby girl is already one month old. When they say time flies by once baby comes, it’s the truth. December 4, 2018 was such a special day in my life, and I hope that by documenting all the details here, I will always remember it like it was yesterday. 

My pregnancy was a bit of a roller coaster throughout the past year. It was definitely filled with ups and downs. At our 20 week ultrasound appointment, we learned that Kinley was breech. I could actually feel her head as a hard spot under my right ribs. She was in a frank breech position where her legs were up next to her head, and she was sitting in a v-shape. They told us not to worry, because there was still so much time for her to flip over and get into the right position.

By our 36 week appointment, she still wasn’t flipped, and we started discussing the possibility of a c-section. We scheduled her birth date for December 6th at 39 weeks pending she didn’t flip before then. I knew that with the c-section my recovery was going to be much more difficult, but at the end of the day I just wanted what was safest for my baby. 

Tuesday, December 4th started just like any other day. I began my maternity leave the day before, so I spent most of the day cleaning the house and preparing for baby’s arrival. I was having some lower back pain that day, but nothing out of the ordinary. That afternoon, my sister and I went to get mani/pedis as a last way to treat myself. 

The gentleman who was giving me a pedicure kindly explained that this could cause me to go into labor. I laughed it off and told him to go ahead… I was scheduled for c-section in two days anyways. Not sure if he saw this as a challenge, because I had a really great foot and leg massage that day.

My sister dropped me off back at home around 6:15pm, and my husband, Jacoby, walked into the door five minutes later. We quickly chatted about our days, and I told him about my pedicure experience. I joked that we might need to go to the hospital that night. He wanted to use the bathroom, but I told him to let me go first and I would make it quick. (Not sure why… we have two bathrooms in our house. Haha.) 

As soon as I sit down on the toilet, kaboom! I yell out to my husband, “Jacoby, my water just broke!” He told me to stop lying, and it wasn’t funny. I opened the door and once he saw my face, he knew I wasn’t kidding. I called my doctor, and he told me to head to the hospital and that I would be having my baby tonight. This was about 6:30pm.  

Continue Reading →
11 In Bedroom/ Home Decor/ House Tour/ interior design/ New Construction/ Our Story

Home Tour: Farmhouse Master Suite

Relaxing Master Suite

When my husband and I thought about building our first home together, we knew creating a relaxing farmhouse master suite would be an important aspect.  We wanted to create a space that felt like a calming retreat away from the real world.  We wanted it to be soft, yet sophisticated, and incorporate a few rustic elements elements to tie in the rest of our farmhouse decor.  So come on in, I’d like to invite you on a grand tour of our farmhouse master suite.

Upon deciding that a one-story, ranch floor plan would be best for us, we also opted to have the master suite located on one side of the home, and then the additional bedrooms located on the other side.  We felt like this would enable us to have some form of privacy down the road when we do start to have a family.  Now, we may learn to hate this layout since it will require us to do a lot more walking back and forth later on.  But then… YAY for getting those steps in!

Farmhouse Bedroom Sign

The Bedroom

Walking into our bedroom, you first see our queen bed split between two large windows.  I love how this lets in so much natural light.  Our windows open up to our backyard which backs up to cornfields.

Continue Reading →

0 In Home Decor/ House Tour/ Living Room/ New Construction/ Our Story/ Tips and Tricks/ Uncategorized

House Tour: Our Farmhouse Great Room

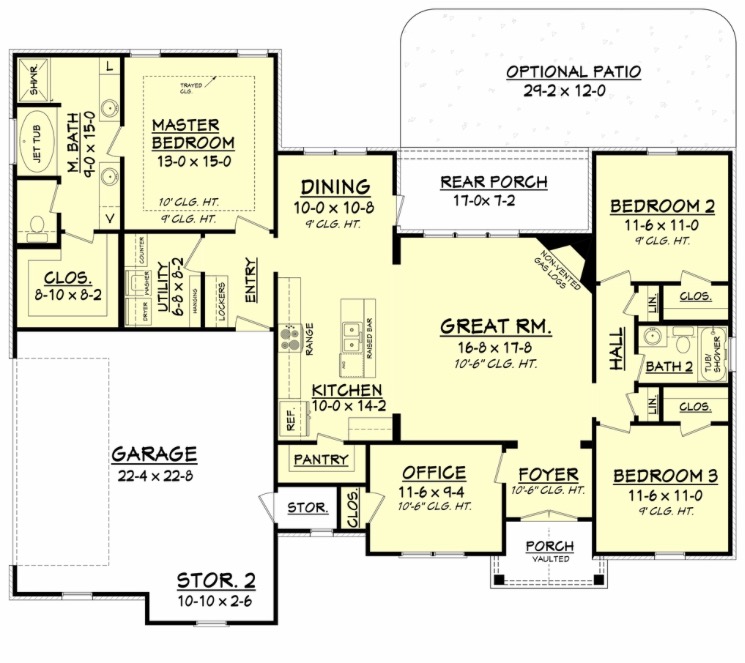
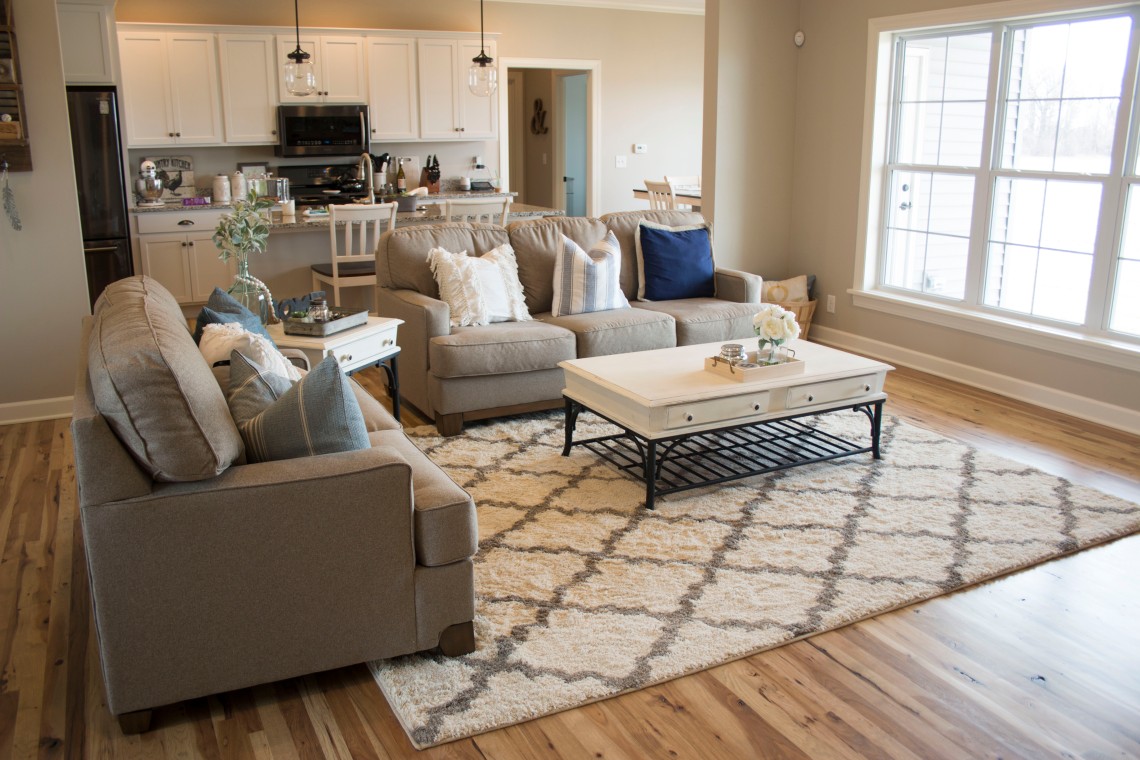
When my husband and I decided to build our home, we knew we wanted open concept.  The thought of having one big great room for our kitchen/living/dining was perfect for us.  Not only does it create a perfect experience for entertaining, I’m hoping that down the road when we have little ones, it will make our lives a bit easier as well.

Farmhouse Great Room

I thought I would share a little tour of our Farmhouse Great Room to show how we set up our furniture to break up the space and to still make it feel purposeful.

IMG_0324

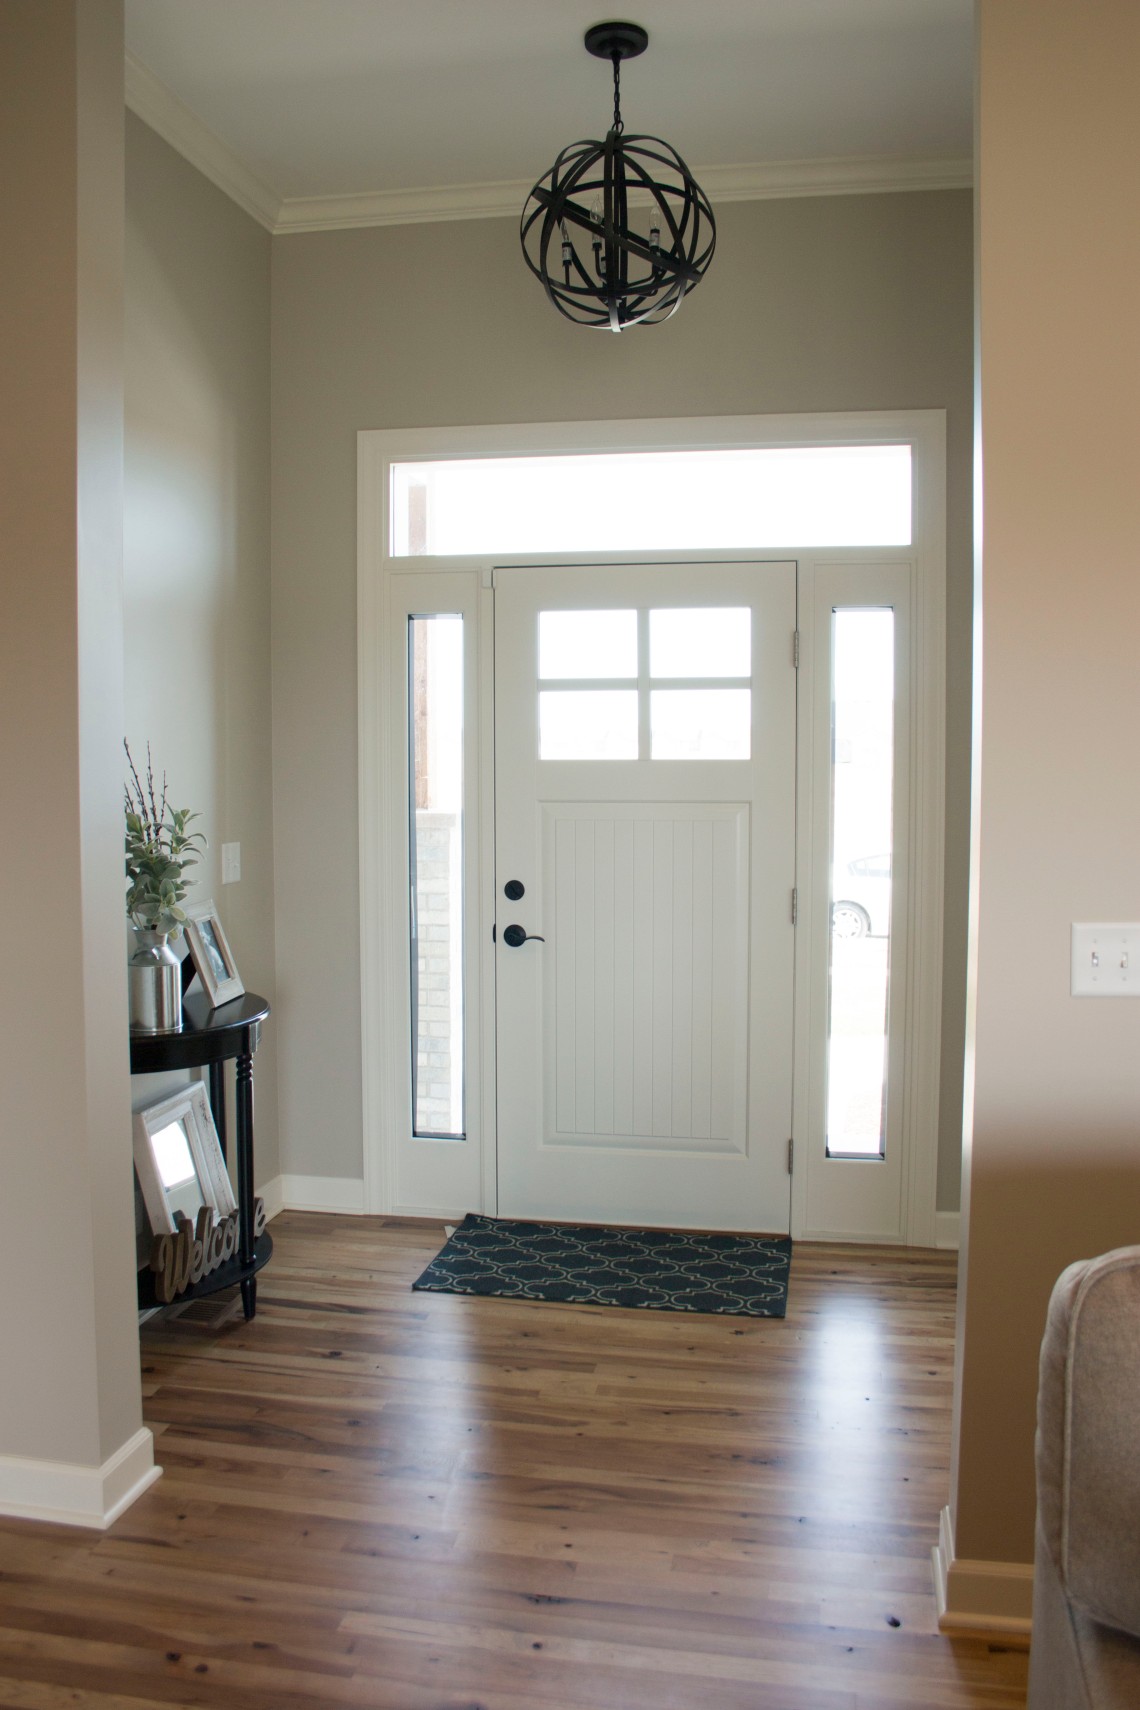
When you walk in our front door, we knew we wanted our entry way to make a statement.  My husband and I both fell in love with this Metal Orb Chandelier from World Market,  and you really can’t beat it for the price.  A similar option from Pottery Barn will cost you almost three times as much.  This light fixture gave the space a rustic/industrial feel the second you walk in the door.

Also, one of the upgrades in our home that we opted for was our front door.  Again, with such a grandiose entry way from the outside and the interior, we knew this was worthwhile and would immediately give the house some more curb appeal.  We went with the Therma-Tru Classic-Craft Canvas Collection fiberglass door with the craftsman grille and sidelites.

IMG_0327

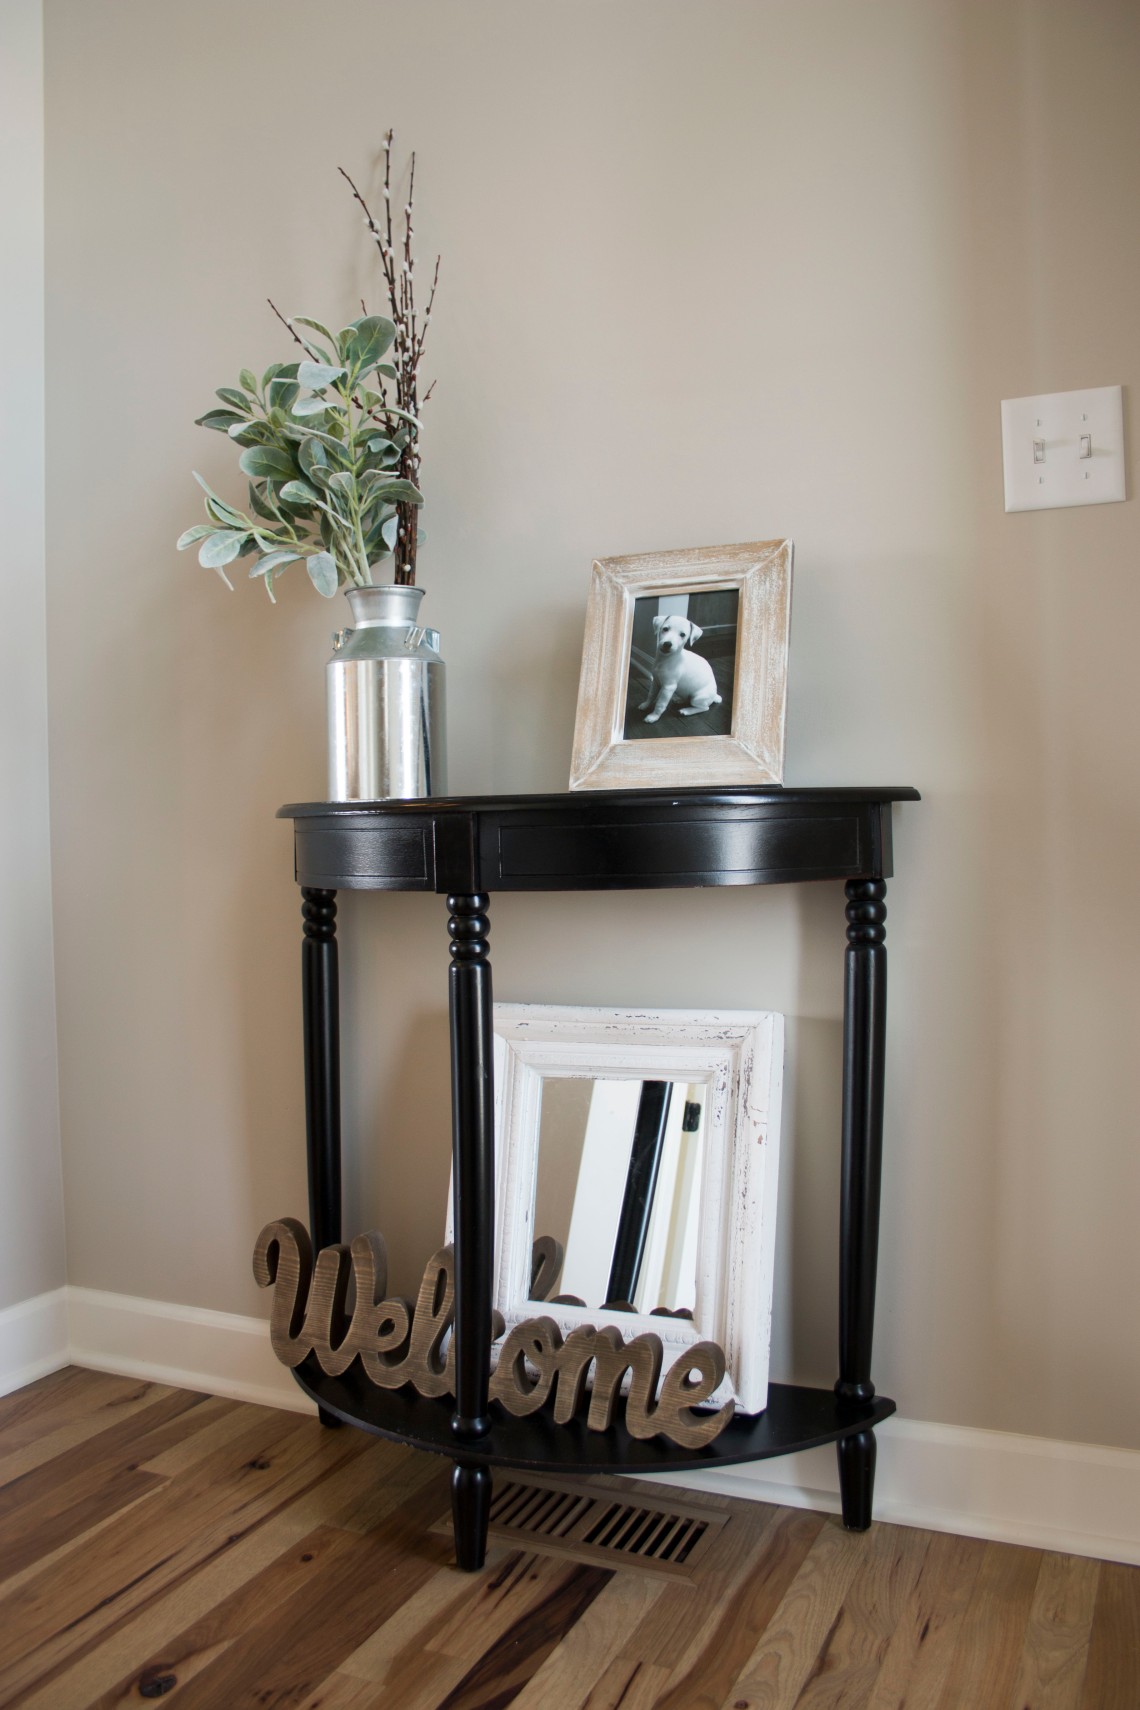
I just love neutrals and simplicity.  That’s why we opted to paint the majority of our house using Benjamin Moore Revere Pewter.  It’s the ultimate ‘greige’ paint.  Depending on the lighting, your furniture and decor, this color can look look anywhere from a light tan color to a cooler gray.  I like that it keeps the space light, bright and airy.   We painted our trim a slightly off-white using Benjamin Moore White Dove.  Our builder recommended that we stay away from a true white, because it tends to show dirt and dust much easier.

LivingRoom

IMG_0366(1)

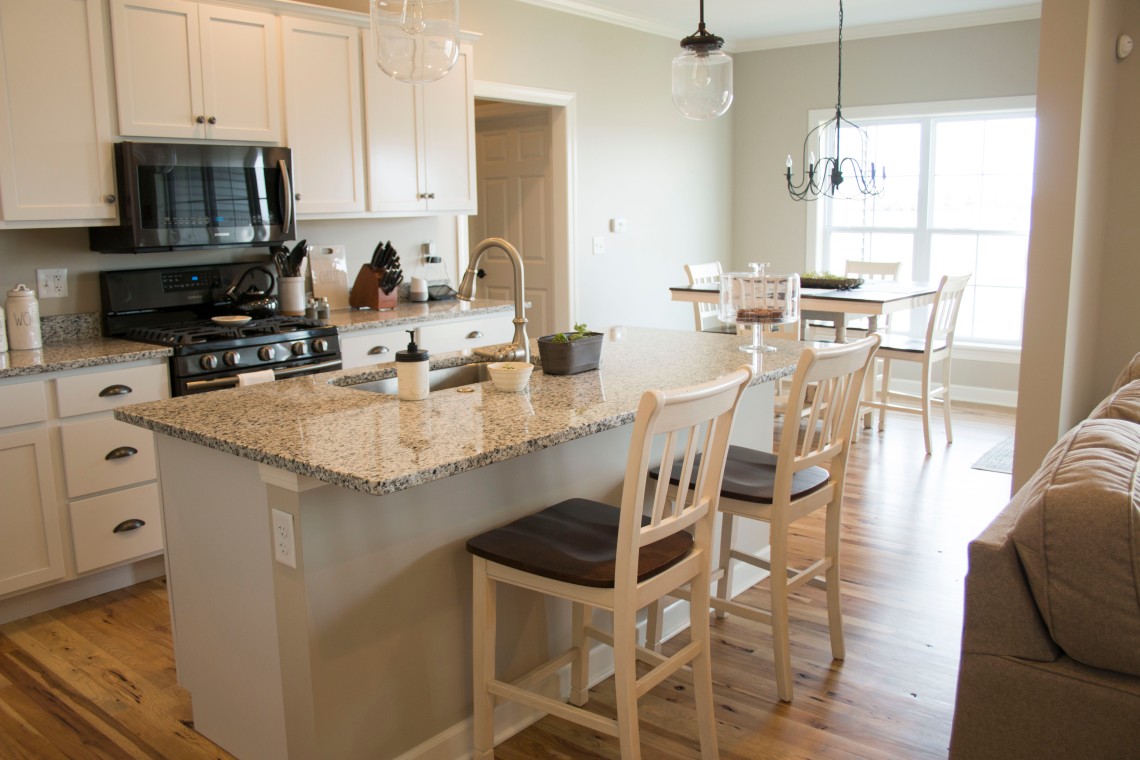
We also had a very specific vision (and budget) in mind for our light fixtures in our kitchen and dining spaces.  We knew what look we wanted, but had a very specific budget we wanted to stick to.  When a building a house, it’s so very easy to go over on lighting.  It can really add up fast!  So when we discovered Menard’s Patriot Lighting® Judd 13″ Olde Bronze 1-Light Mini Pendant we were thrilled.

IMG_0429

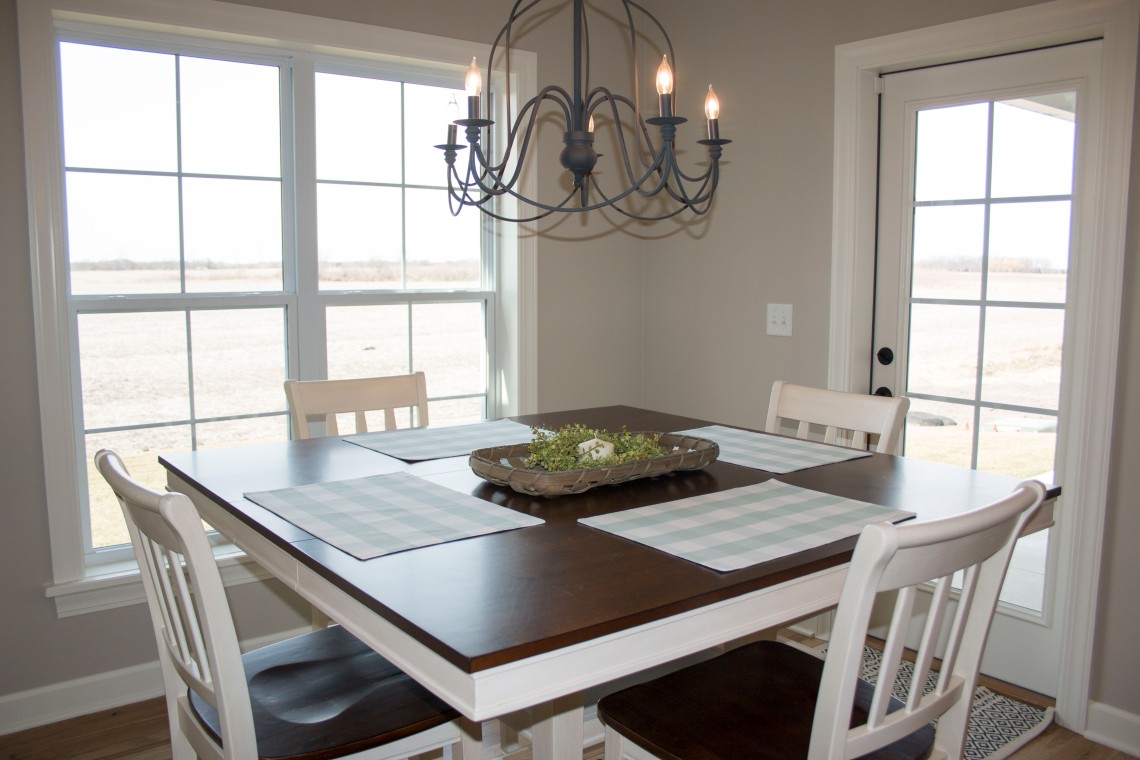
After watching countless episodes of Fixer Upper, I always knew I wanted a “Joanna Gaines-inspired” farmhouse chandelier for our dining nook.  I’m telling you… the lighting selection at World Market has to be a best-kept secret.  The looks are so on trend, but yet an incredibly affordable price.  We went with the Rustic Wire Chandelier.  The color is a matte gray, but I’ve read some reviews from buyers who decided to paint it black and had great success.  For me, I don’t mind the gray color… but if you’re set on black this could be an option.

IMG_0315My absolute favorite part of our Farmhouse Great Room has to be our fireplace.  Truth be told, I never realized how large it would be until we started looking at mantle selections, but I’m in love.  Without it, I’m not sure the space would have the same flow.  When building our house, the fireplace was always a must-have.  Living in Illinois where it’s pretty cold at least six months out of the year, it’s so nice to have as a practical heat source in addition to being a focal point.

IMG_0346
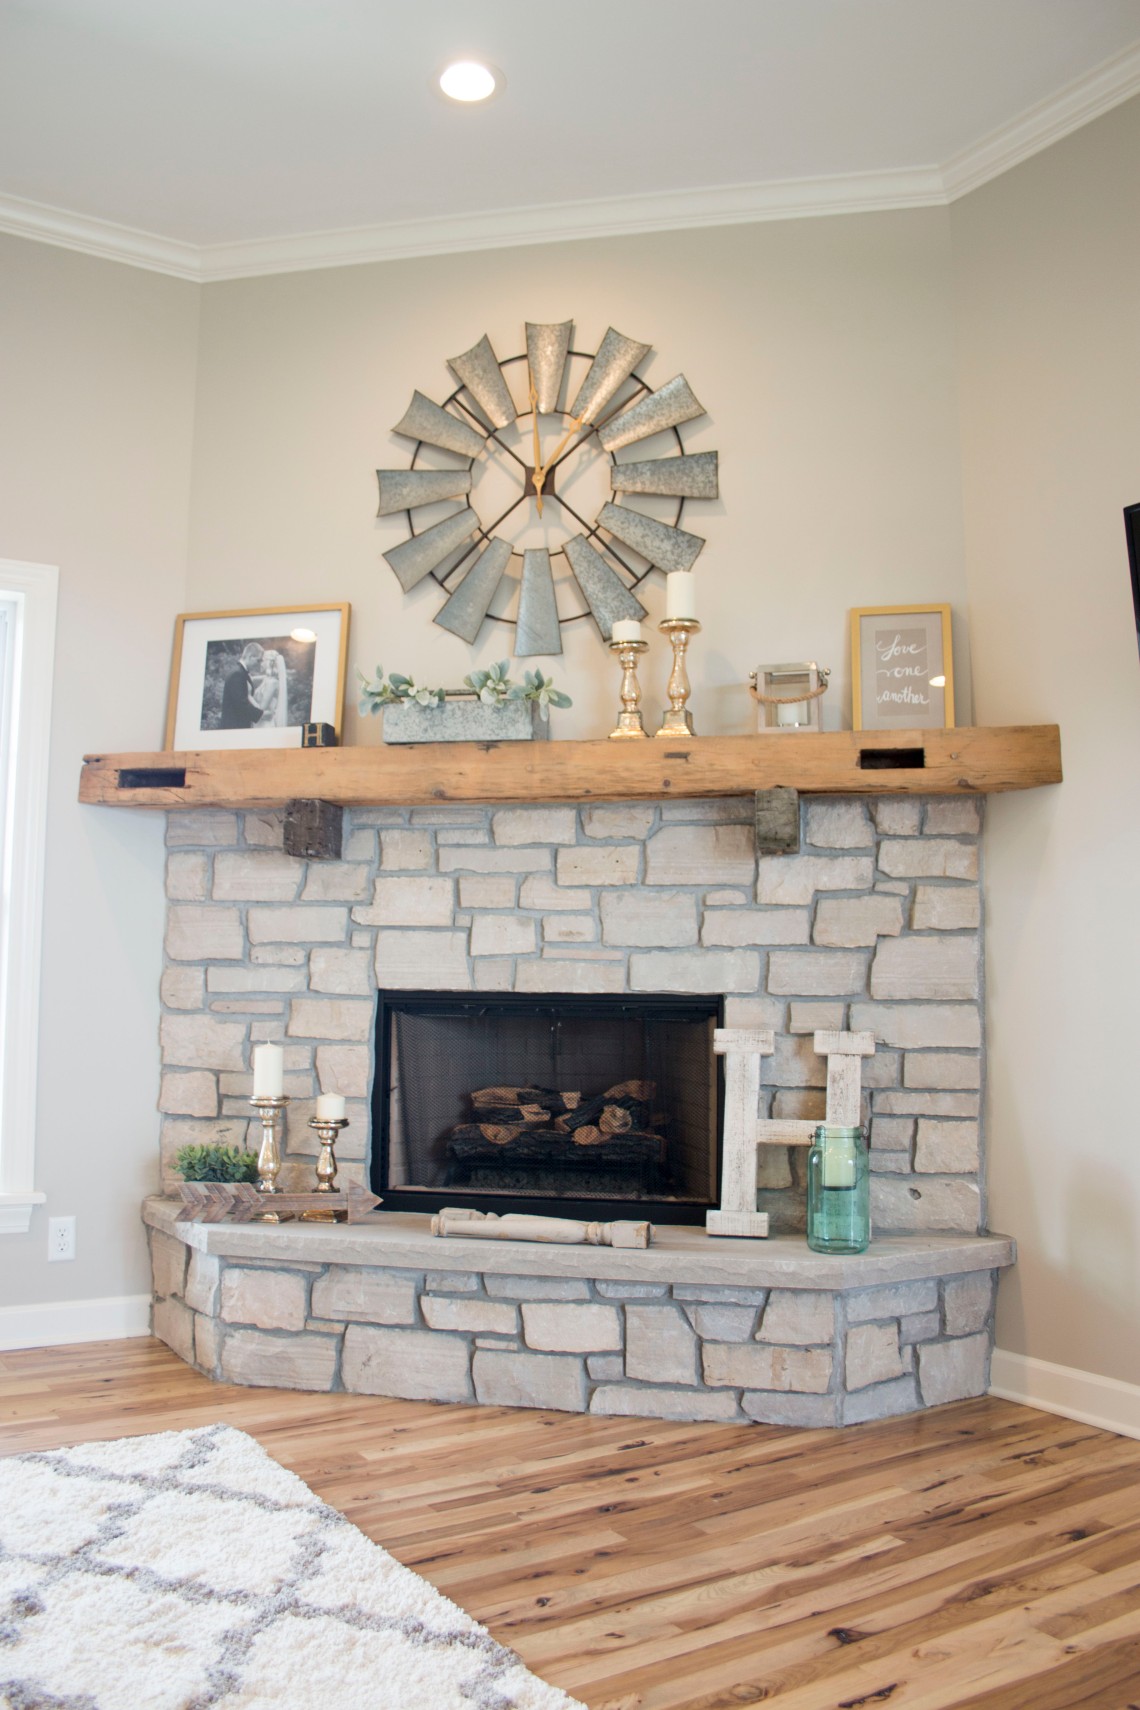
Rather than a traditional brick fireplace, we opted for stone to give it a more rustic look.  Our mantle is an actual old barn beam that came from a local farm here in our area.  We decided to showcase the slots in the wood by leaving them in the front to show the authenticity of the piece.  This serves no purpose, just injects some character. (We get this question a lot.)  The beam was sanded before it was installed, but we decided not to stain it, because we loved how it looked just raw.

Finally, to enhance our home’s rustic, farmhouse look, we decided to go with hickory wood flooring for our entire great room.  We knew that we wanted a wood that was a bit harder, and would be able to handle some wear and tear from our dog and future children.  Originally, we thought we wanted a wider plank and dark floor.  But we completely changed our minds and decided with a more narrow plank to hide any flaws and a lighter color so we didn’t need to keep up with the cleaning quite as often. I have to say… this was a GREAT decision for us.

Traditionally, hickory isn’t a wood that is typically stained.  However, I knew that I wanted to eliminate any sort of yellow tones that the wood has a tendency to show. We went with Minwax Weathered Oak Wood Finish with a matte top coat.  This was one of the only decisions that the hubby and I couldn’t agree on… I was Team Stain and he was Team Natural.  After much debate, the right team won (obviously) and today he agrees that it was the right choice.  I win!

That pretty much covers our whole great room… if you have any questions at all, please ask!  I hope you found this home tour blog post helpful when it comes your own renovation/building projects.

xo,

lauren

Save

Save

Save

2 In New Construction/ Our Story

Tips for Building Your Dream Home

After going through the home building process, my husband and I get a lot of questions about building our home. When we started, we certainly weren’t experts! We were actually pretty clueless. So I’m sharing what we learned in hopes that it might help someone down the road.

1. Do your homework. This may sound like common sense, however you would be surprised how many people dive into home building before really knowing what they want. Research different builders in your area and talk to their past customers to find out the good/bad/ugly. Also, find out what kind of a reputation your builder has with your city. My husband’s uncle works for our city, and we relied heavily on his advice. He told us which builders to steer clear from and who might be worth considering.

2. Watch HGTV with your significant other. Come on, Lauren, really? I know… this might seem like silly advice, but I can’t tell you how many episodes of Flip or Flop, Fixer Upper, Love It or List It, House Hunters, etc. we watched in the last year. It was a lot! But what that did for us was create a conversation about what we liked and what we really didn’t like. It helped us to create a cohesive vision for our future home which I believe saved us from quite a few arguements down the road.

3.  Establish a budget. No one likes talking about money, but it has to be done. My recommendation would be to give yourself some wiggle room within your budget so if you do go a bit over, you’re not stressing. For our project, we ended up spending about 10% more than we originally budgeted. Those darn upgrades!

4. Meet with potential builders and discuss your budget. Take the time to get to know your builder before you hire them. Remember… you’re going to be working closely with them over the next 6 months or longer, so it’s important to have a good working relationship. Talk to them about your budget and your goals for your new home and any non-negotiables. If you know you need a three car garage, let them know that. Decide how many bedrooms and bathrooms you are looking for. From there, your builder should be able to recommend the size of home they would be able to accommodate within your budget.

5. Find a floor plan you love.  Some builders will already have established floor plans and models you can choose from for your new home, or you may decide to go with a completely custom builder, which is what we decided to do. There are so many websites out there where you can purchase floor plans, but we found our home at www.houseplans.com. There are different options available to fit any size of budget.  Here’s the plan we selected.

img_7274

6. Invest in ceiling height. When considering which floor plan might be best for you, remember to look at the height of the ceiling. It’s almost as important as the number of square feet. Most of the ceilings in our home are over 10 feet, so it certainly makes the space feel larger than it actually is.

7. Location, location, location. A true staple in any decision when it comes to real estate. Decide what matters most to you about your location. Is it proximity to good schools, walkability, safety, living near family, resale, etc.? Once you know what matters most to you, it makes selecting your lot a whole ‘lot’ easier. (hehe.)

8. Ask a lot of questions. The phrase “There are no dumb questions,” couldn’t be more true in this scenario. Just ask. I’m sure it’s nothing that builder hasn’t heard before.

9. Stay organized. Keep track of all of your decisions and paperwork. It’s not uncommon that your lighting selection can get lost in the shuffle, so make sure that you always have everything saved on file. I took photos on my phone of everything throughout the process including every selection with the item number and price. This made it very easy for me to pull up anything I needed at any given time.

I feel so very lucky that our home building experience was so positive. Hopefully with these tips and tricks, you will have no trouble constructing the home of your dreams.

xo,

lauren

Save

1 In New Construction/ Our Story

Our Home Building Journey

For my very first blog I think it makes the most sense to start from the beginning…

Jacoby and I lived in Chicago for two years, and we loved it. We have so many great memories of living in the city together.  However, after we got married, we realized that when we planned to start a family it would be a real challenge for us financially and logistically.  So we went ahead, bit the bullet and moved to the suburbs.

To sum it up… WE HATED IT.  Very quickly, we soon realized that the burbs just weren’t for us.  We’re two country kids at heart who grew up surrounded by cornfields.  We thought that by moving out of the city meant moving away from traffic, noise and chaos.  We found ourselves either driving back into the city for fun activities with friends or driving out to the country to be with our folks.  We eventually decided that moving back home to where we both grew up was the right place for us to be.

Our decision to build our home didn’t happen on purpose.  Quite honestly, we were set on buying a starter home.  Neither my husband or myself had ever owned a home before, so it was our goal to find one that would work for a few years, and then we could figure out what we really wanted from there.

In January of 2016, we started our search for a new home.  We found out that the market for houses in our area was SUPER COMPETITIVE.  If was something good and decently priced, it was being snatched up in less than 24 hours.  We were watching Realtor.com like hawks.  If something came up, I was calling our realtor in a matter of minutes.  Over a four month period, we made four different offers on four different homes. UGH!  Two went to bidding wars, which we lost because we refused to overpay for what we were getting.  For another house, our offer was accepted, but they wanted to be able to back out at any time before the close day.  There was no way we were going to let that happen.  For the final house we placed an offer on, it was accepted, and then during the ten day review period they pulled out.  The seller thought they had a new job offer in Atlanta, but it turns out they didn’t.  To say we were devastated would be an understatement.

With only two months left on our rental in the burbs, we had to decide what our next move would be.  There was just nothing on the market that we felt good about purchasing at the time, so we came to the conclusion that building our home would be the best option. There was just one problem… we literally had no clue what we were doing.  Sure, I’ve watched countless hours of HGTV, but that’s about the extent of my home building knowledge. My hubby was working with less than that.

In a future post, I plan to detail what we learned about the home building process and some valuable tips and tricks that we would have loved to know throughout the process. <- Post now available, just click to read. 🙂

In July 2016, we broke ground on our new home… fast forward to January 2017, we closed and The Holtz House was officially born!  TA-DA!  So that’s how we got to where we are today.  I couldn’t be happier with our decision to build our first home.  I truly believe that everything happens for a reason in life.  If you trust in your path, even when life throws you challenges, you’ll always land where you need to be.

-Lauren