Browsing Tag

DIY Furniture

3 In Bedroom/ DIY/ Furniture/ Home Decor/ How To/ interior design/ Tips and Tricks

DIY Project: How to Chalk Paint a Mirror

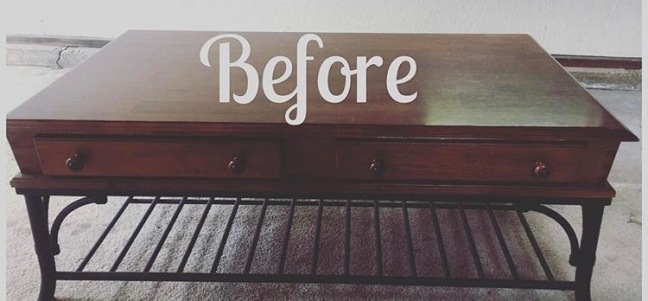
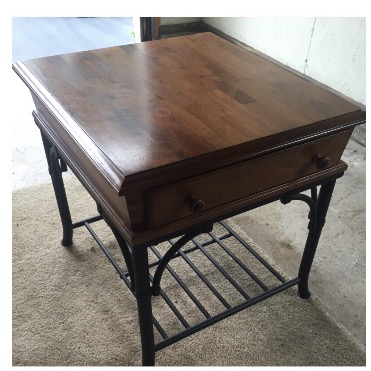
About a month ago, my bestie, Morgan, moved into an apartment in Chicago.  She wanted her new space to feel cozy and comfortable without having to spend a lot of money.  She’s currently in grad school so keeping it cheap was a must!  She expressed the need for a get-ready station in her bedroom since she shares one small bathroom with her roommate.  We looked all over for a simple vanity that would fit the space.  The ones we found were either too expensive or just not quite right.  So instead, we decided to refinish some old furniture pieces that she already had using chalk paint.

We spruced up the small table by using Annie Sloan Chalk Paint in Graphite with Annie Sloan Soft Wax in Clear over the top.  For the technique we used, just check out this past blog post… Transforming a Garage Sale Find with Chalk Paint.

For the mirror, here’s what we did…
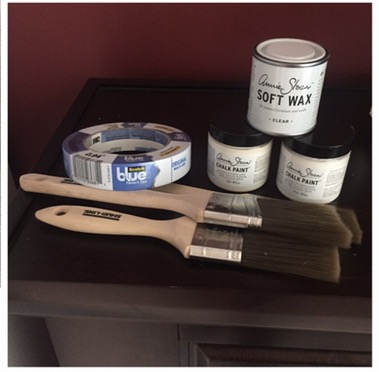
Supplies


Instructions

  1.  Start off with an old mirror you’re looking to transform.  We used this old gaudy gold mirror pictured below or a wooden frame could work as well.

IMG_8362

2.  Brush the edges of the mirror off with a dust rag to insure you’re starting with a clean surface.

3.  Use the painter’s tape to create a rectangle around the outer edge where the mirror meets the frame.  Be sure to take your time and get as close to the edge of the frame as possible.  This will insure a clean edge between the painted frame and the mirrored surface.  You will be taping right on the mirror’s surface.

Continue Reading →

3 In Bedroom/ DIY/ Furniture/ Home Decor/ How To/ Tips and Tricks

DIY Project: How to Build a Barnwood Headboard

I absolutely love long weekends.  I just feel like you can be so much more productive while still leaving time for some fun and relaxation.  This 4th of July weekend was no exception.  Between concerts and pool parties, I still had the opportunity to take a trip to the Kane County Flea Market.

I brought along my bestie who was a flea market virgin.  It’s safe to say she thoroughly enjoyed the experience, and we’ll definitely be heading back again soon.  While at the flea market, we picked up some reclaimed barnwood from a local vendor for a big time DIY project.  Her and I have been talking about taking on building a headboard for some time now.  Originally we thought we wanted to use pallet wood, but when we saw the beautiful, gray-weathered barnwood, we knew that it would be just perfect.

Now, I must say, the thought of creating a headboard can be fairly intimidating just based on the sheer size of the project alone.  But honestly, the form and design is fairly straightforward so this can be a very simple DIY as long as you have access to all the tools you need.  So if you’re looking to give your bedroom a rustic refresh, this is for you!

  Materials

  • Salvaged barn wood
  • 160 grit sand paper discs
  • Wood Screws (we used 1.5 in., but this will depend on the thickness of your wood)
  • (2) 1 in. x 6 in. x 6 ft. Common Board
  • Minwax Polycrylic Protective Finish – clear satin
  • (4) 2″ bolts with 5/8 hex nut (optional)

Tools

  • Power drill
  • Orbital sander
  • Circular saw
  • Protective eyewear and mask

Instructions

  1.  First, you’ll want to determine the desired width of your headboard.  I’ve listed the standard widths for each bed size here:

Twin  39 inches

Twin XL 39 inches

Full  54 inches

Full XL 54 inches

Queen 60 inches

King 76 inches

California King 72 inches

For my queen headboard, I decided to go with 62 inches wide leaving just an inch on each side.  Luckily for me, the barnwood I got measured perfectly.  If it’s too long, you’ll need to measure, mark and saw to your desired size.

Continue Reading →

0 In DIY/ Furniture/ Living Room

Transforming a Garage Sale Find with Chalk Paint

My mother-in-law is the queen of garage sales. She’s a woman of many talents, but her garage sale skills are top notch. She once bought a high top wooden kitchen table with four chairs for $5. After four years, we still have it in our house. That’s skill!

One of my favorite finds that she brought home last summer was a coffee table/end table set that she got for $30. The set is great quality, super sturdy and heavy with black iron piping on the bottom shelf.

img_7233

img_7232

When transforming a piece of furniture, I think it’s so important to start with a quality piece in order to transform it into a quality piece.

Fixing this baby up was super simple… if you’re willing to dedicate the time, anyone can do it. Here we go:

Supplies

  •  Scotch Blue Painter’s Tape
  •  Annie Sloan Chalk Paint – pure white
  •  Annie Sloan Chalk Paint – old white
  • Annie Sloan Soft Wax – clear
  •  Various sizes of paint brushes
  •  Sandpaper
  •  Clean rag or shop towel

img_7234

Continue Reading →