Browsing Category

DIY

0 In DIY/ Home Decor/ How To/ interior design/ Tips and Tricks

How to Apply Shiplap Wallpaper

How To Apply Shiplap Wallpaper

Calling all Joanna Gaines wanna be’s… are you dying for the look of shiplap, but not ready to commit to the real thing?  Do you currently live in a rental where you can make any changes to your living space?  Or maybe you don’t have access to an arsenal of power tools at your disposal. For me, I’m the queen of indecisiveness so it’s hard for me to make a big time commitment to any design trend.  The thought of destroying a whole wall of drywall for something I might not like in the future makes me a little leary.

My IG buddy Amanda @houseoncanal has this AMAZING shiplap wall in her home.  When I asked her about it, she told me it wasn’t even real, and I couldn’t believe it!  It was peel and stick wallpaper! After that, I was sold.  I knew this DIY project wouldn’t be easy, but it would be well worth it to get the “Fixer Upper” look.  Here’s how to apply shiplap wallpaper…

Devine Color Shiplap Wallpaper

Materials

Continue Reading →

0 In DIY/ How To/ Tips and Tricks/ Winter

DIY Fake Snowballs

Happy New Year y’all!  Feels so good to be back… I took a mini-break during the holiday season, and I’m so excited to kickoff the new year with a fun DIY project.  As we say goodbye to Christmas decor, it’s now the perfect time to transition to some winter decor.  I don’t know about you… but my house was feeling pretty darn bare after taking down all of the Christmas goodness.  So if you’re looking for ways to add a wintery feel to your home, some DIY fake snowballs can totally do the trick.  These DIY fake snowballs make a great vase filler, you can even add them to any farmhouse tray, wire basket or even a dough bowl.  Throw in some faux evergreen sprays for that extra snow season kick.

Fake Snowball Materials

Materials

  • Styrofoam balls, various sizes (after testing both the textured and smooth, I found textured to look more realistic)
  • Fake snow flakes
  • White craft paint
  • Mod Podge Matte
  • White/Clear glitter
  • Foam paint brush
  • Toothpicks
  • Empty box

Instructions

  1.    First, to get started, you’ll want to stick your toothpick through the styrofoam ball to give you a place to hold onto it.  Using the white craft paint, generously paint each ball white.

2.  Once you get a ball painted, then go ahead and stick the toothpick through the bottom of an empty box to create a place to hold all the drying snowballs.

3.  After letting them dry for a few hours, you’re ready for the sparkle! Apply a generous layer of Mod Podge and roll the snowball around in a mixture of fake snowflakes and glitter.  I also heard that adding epsom salt to the mix is a good way to give an item a realistic icey look.


Fake Snowballs DIY

4.  Then just stick the toothpicks within the balls back in the empty box.  Let them dry overnight, and that’s it!  Now you can style them within your home however you’d like!

Such a simple DIY to create your own winter decor!  Will you be decorating your home for winter this year?  How about Valentine’s Day?

xo,

lauren


4 In Christmas/ DIY/ Home Decor/ How To/ Winter

DIY Mini Christmas Wreaths from the Target Dollar Spot

Christmas Wreath Chair Backs

Deck the halls with boughs of holly, fa-la-la-la, la-la-la-la!  Christmas decorating season is officially here!  This is seriously the most wonderful, magical time of year.  I just LOVE decorating our home for the holidays.  If I could pull it off, every single room in our house would be decorated.  I’m not quite at that expert level yet… but maybe one day!

I was looking to incorporate more Christmas decor into our kitchen, and I loved the idea of tying wreaths onto all the backs of our chairs.  Real boxwood wreaths can be a bit pricey, so for my fellow pals on a budget, this DIY project is just for you.

Here’s what you’ll need to create DIY Mini Christmas Wreaths…

DIY Boxwood Wreaths

Materials

  • Wired Boxwood Garland –  I purchased mine from Target Dollar Spot but here’s a similar option from Amazon
  • Ribbon of your choice
  • Scissors

Continue Reading →

11 In DIY/ Furniture/ Home Decor/ How To

How to Build a DIY Wood Mirror Frame

How To Build Wooden Mirror Frame

Everyone has one.  A plain, basic, full-length mirror that’s doing nothing for  your home decor game.  It’s time to step it up buttercup, and give this mirror a makeover.  In this DIY post, I’ll show you how to build a rustic wooden mirror frame.

Materials Needed

*** Tip: Make sure that when you purchase your boards that they are all the exact same width.  Even though all three were labeled the same size, one was slightly smaller which made it more difficult later on for us.  Also, be sure that all the boards lay flat to the ground and they aren’t warped at all. 

Instructions

1. The mirror I started with featured a thick, plastic frame.  First, I removed the paper backing and then started to pull away the supporting pieces that were held in with staples.  Once that was completed, I used the flip side of the hammer to hook on to the frame and carefully pull the frame off of the mirror.  You must go super slow and be patient!  If you break the mirror during this step, there’s no going back!  It might also be a good idea to wear protective eye wear during this step.  The pieces can pop and fly off. 

Continue Reading →

22 In DIY/ Furniture/ Home Decor/ How To/ Tips and Tricks

DIY Project: How To Build Pipe Shelves

DIY Industrial Pipe Shelves

Have you been on a desperate search to find the perfect industrial shelving unit to fit your space?  I’ve got you… search no longer!  With this quick and easy tutorial, you can build the perfect DIY pipe shelves.

It takes a little time, patience, some elbow grease and the supplies below…

Supplies

  •  Power drill
  •  Stud finder
  •  Two (per shelf) 3/4 in. diameter black iron floor flange fitting
  •  Two (per shelf) 3/4 in. diameter black iron cap fitting
  •  Two (per shelf)  3/4 in. 10 in. black pipe nipple
  •  Wooden Plank (one per shelf)
  •  Level
  • #6 Drywall Screws, 2 in. in black
  • Mr. Clean Magic Eraser

Continue Reading →

3 In Bedroom/ DIY/ Furniture/ Home Decor/ How To/ interior design/ Tips and Tricks

DIY Project: How to Chalk Paint a Mirror

About a month ago, my bestie, Morgan, moved into an apartment in Chicago.  She wanted her new space to feel cozy and comfortable without having to spend a lot of money.  She’s currently in grad school so keeping it cheap was a must!  She expressed the need for a get-ready station in her bedroom since she shares one small bathroom with her roommate.  We looked all over for a simple vanity that would fit the space.  The ones we found were either too expensive or just not quite right.  So instead, we decided to refinish some old furniture pieces that she already had using chalk paint.

We spruced up the small table by using Annie Sloan Chalk Paint in Graphite with Annie Sloan Soft Wax in Clear over the top.  For the technique we used, just check out this past blog post… Transforming a Garage Sale Find with Chalk Paint.

For the mirror, here’s what we did…

Supplies


Instructions

  1.  Start off with an old mirror you’re looking to transform.  We used this old gaudy gold mirror pictured below or a wooden frame could work as well.

IMG_8362

2.  Brush the edges of the mirror off with a dust rag to insure you’re starting with a clean surface.

3.  Use the painter’s tape to create a rectangle around the outer edge where the mirror meets the frame.  Be sure to take your time and get as close to the edge of the frame as possible.  This will insure a clean edge between the painted frame and the mirrored surface.  You will be taping right on the mirror’s surface.

Continue Reading →

3 In Bedroom/ DIY/ Furniture/ Home Decor/ How To/ Tips and Tricks

DIY Project: How to Build a Barnwood Headboard

I absolutely love long weekends.  I just feel like you can be so much more productive while still leaving time for some fun and relaxation.  This 4th of July weekend was no exception.  Between concerts and pool parties, I still had the opportunity to take a trip to the Kane County Flea Market.

I brought along my bestie who was a flea market virgin.  It’s safe to say she thoroughly enjoyed the experience, and we’ll definitely be heading back again soon.  While at the flea market, we picked up some reclaimed barnwood from a local vendor for a big time DIY project.  Her and I have been talking about taking on building a headboard for some time now.  Originally we thought we wanted to use pallet wood, but when we saw the beautiful, gray-weathered barnwood, we knew that it would be just perfect.

Now, I must say, the thought of creating a headboard can be fairly intimidating just based on the sheer size of the project alone.  But honestly, the form and design is fairly straightforward so this can be a very simple DIY as long as you have access to all the tools you need.  So if you’re looking to give your bedroom a rustic refresh, this is for you!

  Materials

  • Salvaged barn wood
  • 160 grit sand paper discs
  • Wood Screws (we used 1.5 in., but this will depend on the thickness of your wood)
  • (2) 1 in. x 6 in. x 6 ft. Common Board
  • Minwax Polycrylic Protective Finish – clear satin
  • (4) 2″ bolts with 5/8 hex nut (optional)

Tools

  • Power drill
  • Orbital sander
  • Circular saw
  • Protective eyewear and mask

Instructions

  1.  First, you’ll want to determine the desired width of your headboard.  I’ve listed the standard widths for each bed size here:

Twin  39 inches

Twin XL 39 inches

Full  54 inches

Full XL 54 inches

Queen 60 inches

King 76 inches

California King 72 inches

For my queen headboard, I decided to go with 62 inches wide leaving just an inch on each side.  Luckily for me, the barnwood I got measured perfectly.  If it’s too long, you’ll need to measure, mark and saw to your desired size.

Continue Reading →

0 In DIY/ Home Decor/ Tips and Tricks

Farmhouse Finds at the Flea Market

Last weekend I attended my first Flea Market of the season.  Even though it was a bit chilly, it was well worth the trip.  This was the first time I attended the Kane County Flea Market in St. Charles, Illinois, and I highly recommend it.  It’s laid out really well, and there’s a large variety of vendors.  Definitely something for everyone!  If you’re local, check it out.

FarmhouseFleaMarket

If you’re looking to incorporate some farmhouse flair into your home, a flea market is a great place to start especially when you’re on a tight budget.

Here’s a few pieces that are fairly simple to find at any flea market at a fair price…

IMG_0380

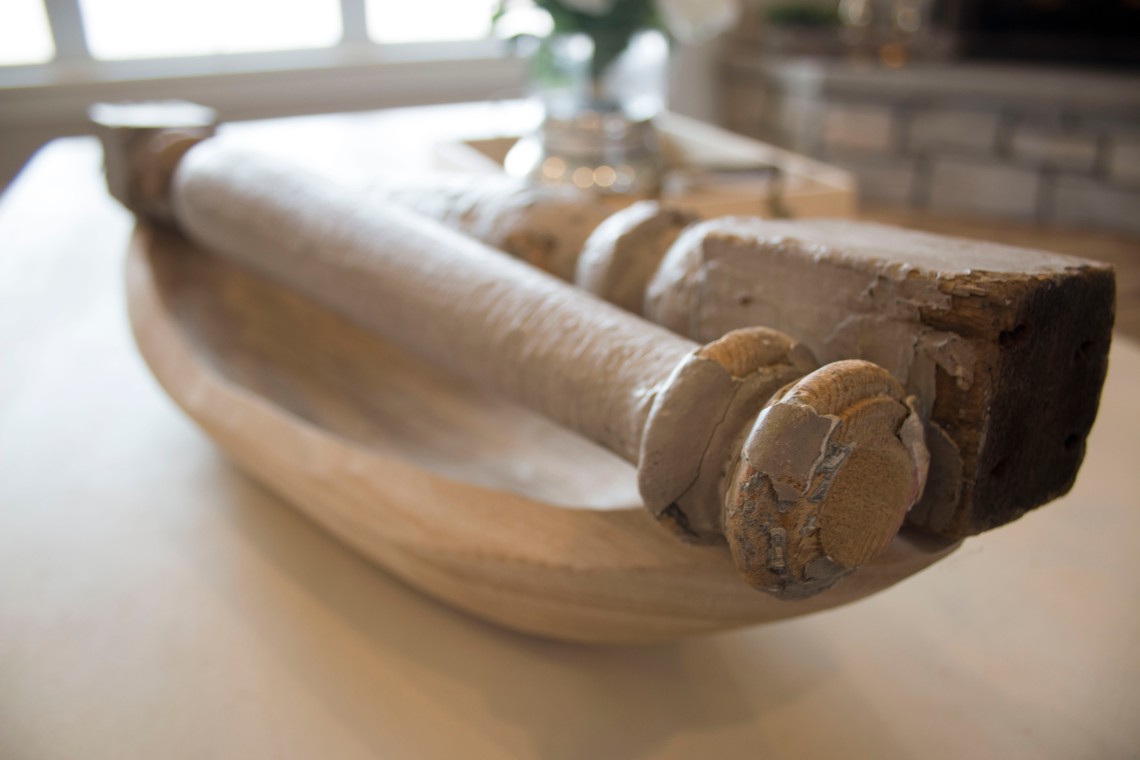
1.  Chippy Spindles

Chippy spindles have been popping up all over lately.  I love how you can incorporate them into almost anything.  Throw them in a dough bowl, hang them in a gallery wall or just style them on a shelf.  The opportunities are endless.  I snagged these beauties for just $14 for the pair.

2.  Wooden Crates

Wooden crates are always plentiful at any flea market.  Just be sure you’re not overpaying for them.  For me, I feel like $10 is fair for an old crate in decent shape.  These rustic beauties are good for adding height when styling shelves and tables.  You can also use them to hold pillows and blankets or just for storage in general.

IMG_0456

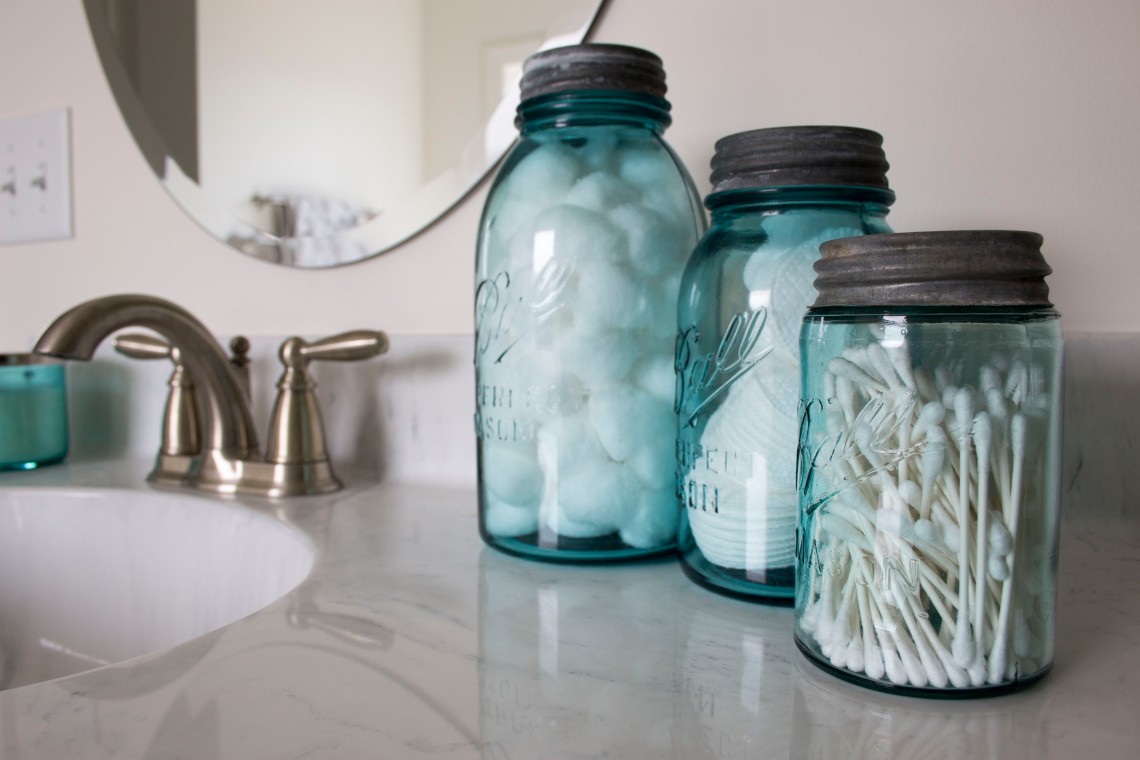
3.  Old Mason Jars

Another flea market find that is always in abundance!  I think old Mason jars are just beautiful.  I use them to hold cotton balls, cotton pads and Q-tips in my bathrooms, but you can do so much more.  They would be super cute in a craft room or an office as well.  Whenever you have small items that can be stored together on display, they are stunning.  Make sure that when you’re buying these, that they’re in good shape.  No cracks or chips.  Also, check to make sure the lid is old and original.  If it’s too pristine, it’s likely too good to be true.  On the underside there will be a glass if it’s truly old.

Continue Reading →

0 In DIY/ Furniture/ Living Room

Transforming a Garage Sale Find with Chalk Paint

My mother-in-law is the queen of garage sales. She’s a woman of many talents, but her garage sale skills are top notch. She once bought a high top wooden kitchen table with four chairs for $5. After four years, we still have it in our house. That’s skill!

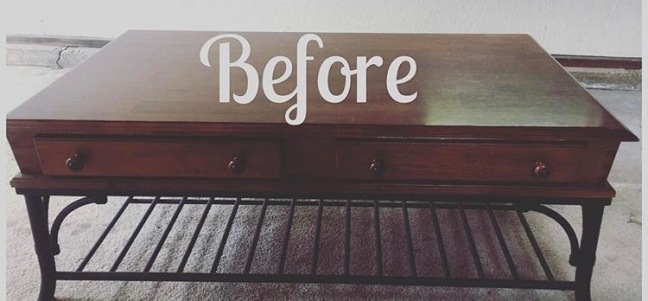
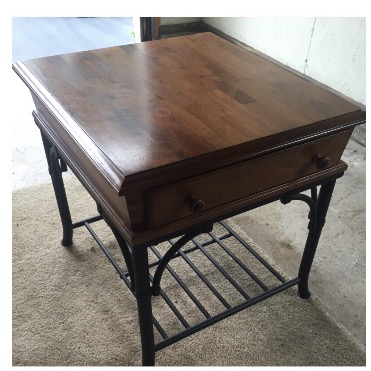
One of my favorite finds that she brought home last summer was a coffee table/end table set that she got for $30. The set is great quality, super sturdy and heavy with black iron piping on the bottom shelf.

img_7233

img_7232

When transforming a piece of furniture, I think it’s so important to start with a quality piece in order to transform it into a quality piece.

Fixing this baby up was super simple… if you’re willing to dedicate the time, anyone can do it. Here we go:

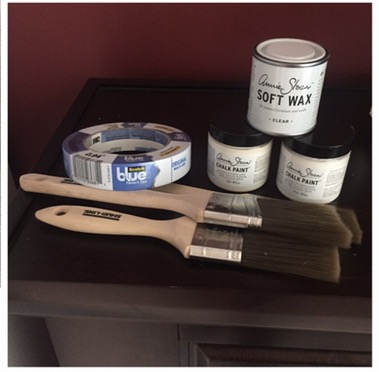
Supplies

  •  Scotch Blue Painter’s Tape
  •  Annie Sloan Chalk Paint – pure white
  •  Annie Sloan Chalk Paint – old white
  • Annie Sloan Soft Wax – clear
  •  Various sizes of paint brushes
  •  Sandpaper
  •  Clean rag or shop towel

img_7234

Continue Reading →